As an Amazon Associate, we earn from qualifying purchases. Some links on this site are affiliate links at no extra cost to you. Our recommendations are based on thorough research and editorial judgment.

How To Repurpose Ladders As Shelves?
Repurposing ladders as shelves is a fun way to add flair to your space! First, we choose a sturdy ladder in good condition, checking for any issues. Next, we select durable shelf materials like plywood or pine. We can then attach shelves using screws and wood glue, ensuring everything is level. Don’t forget to secure heavier items on lower shelves for balance. Ready to get inspired by creative styling ideas for our new ladder shelves? Let’s jump into!
Key Takeaways
- Choose a sturdy ladder and assess its condition, checking for any broken or damaged parts before repurposing.
- Select suitable shelf materials, like plywood or solid wood boards, ensuring they fit your desired spacing and design.
- Attach shelves securely by pre-drilling holes and using wood glue for added stability, ensuring proper alignment and levelness.
- Anchor the ladder shelves with heavy-duty brackets to enhance safety and prevent tipping, especially with heavier items.
- Maintain regular checks for rust or wear and perform maintenance to ensure the longevity and safety of your ladder shelves.
Choosing the Right Ladder for Your Project
When we’re starting on a fun project like repurposing a ladder into a shelf, choosing the right ladder is crucial. First, we should consider ladder height. A taller ladder allows for more shelves, but it might need bracing for stability. Next, ladder materials matter too! Wooden ladders give a rustic feel, perfect for cozy spaces, while metal ladders lend a modern, industrial look.
We also need to think about the number of rungs; more rungs mean more shelving options. Plus, measuring the space guarantees our ladder fits just right and doesn’t take over the room. With these tips in mind, we can choose the perfect ladder to create a stylish and functional shelf. Additionally, considering material quality ensures that the ladder is durable enough to support the items we plan to display. Let’s get started!
Assessing Ladder Condition and Preparing Surfaces
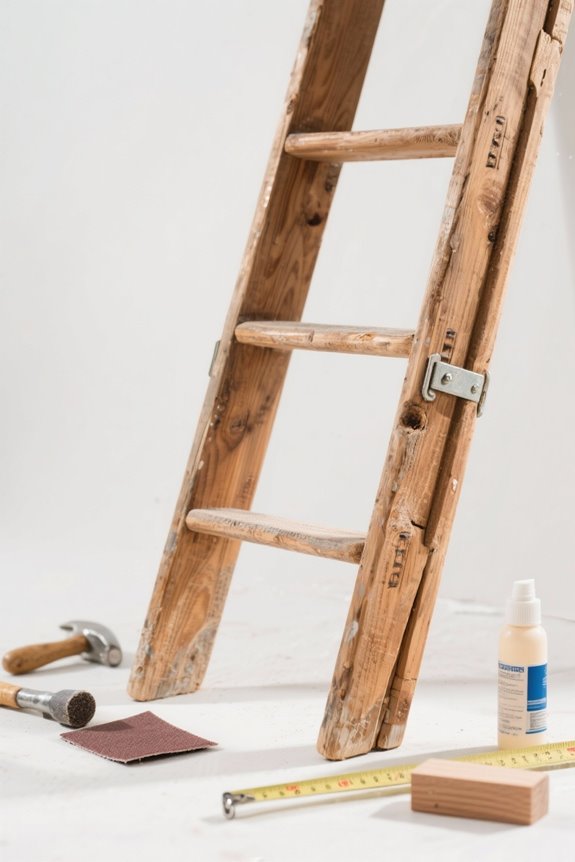
Evaluating the condition of our ladder is the first step in turning it into stylish shelves. Let’s begin with a ladder examination. We need to check for broken, cracked, or bent parts that could compromise its integrity. Don’t forget to inspect bolts and hinges, ensuring everything is secure.
Next, we move on to surface evaluation. Cleaning our ladder is essential; we should remove any grease, dirt, or slippery substances for safe handling. For wooden ladders, let’s sand down any rough spots and confirm that no rot or swelling exists. Metal ladders? We should check for rust and corrosion. After this thorough inspection and cleaning, we’ll be ready to transform our ladder into a beautiful shelf! Additionally, ensuring that the ladder is made from durable materials will enhance its longevity as a shelf. Ready to get started?
Selecting Suitable Shelf Materials
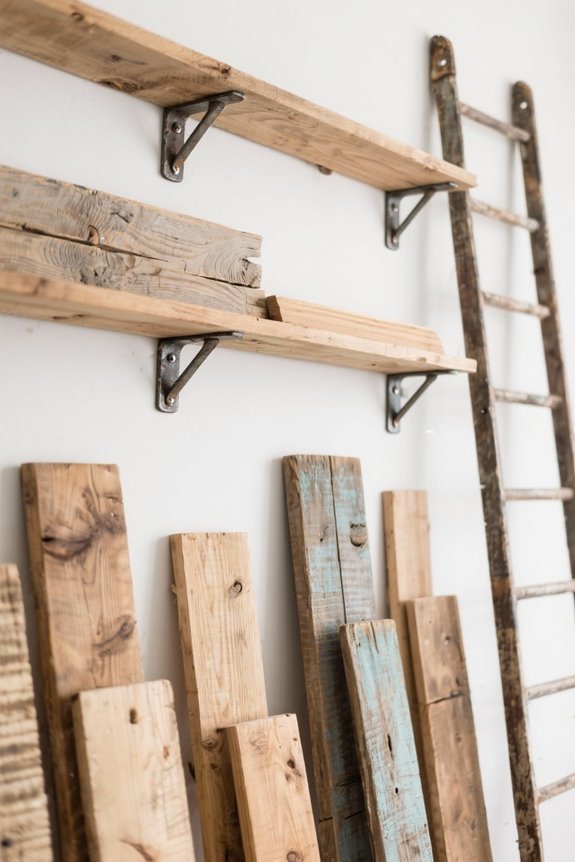
Now that we’ve got our ladder ready to go, it’s time to think about what materials we’ll use for our shelves. For sturdy surfaces, we recommend ¾” plywood options, known for their strength and ease of cutting. If you’re looking for solid wood, pine boards in 1×4 or 1×3 sizes are affordable and easy to work with. Poplar wood offers a smooth finish, perfect for those who love to paint or stain.
When choosing wood types, don’t overlook scrap pieces or leftover boards; they can work wonders for budget-friendly projects. Remember, your shelf thickness should generally be around ¾” to guarantee stability without being too heavy. Ultimately, our material choice enhances both appearance and functionality, so pick what fits your vision! Durability against moisture is also an important consideration when selecting materials for your shelves.
Techniques for Attaching Shelves to the Ladder
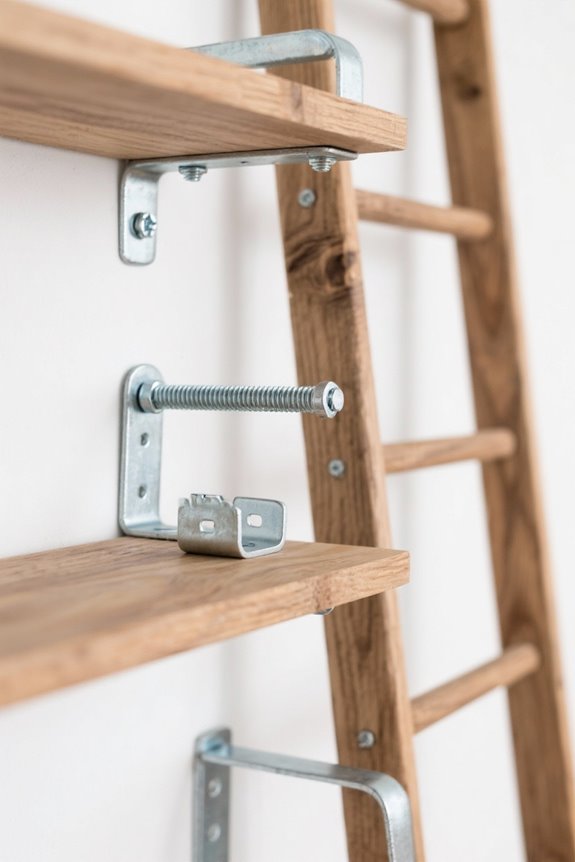
Attaching shelves to your ladder can seem tricky at first, but it’s actually quite straightforward with a little planning. First, let’s inspect the rungs for damage. A quick sanding might be all it needs!
Next, we’ll look at our fastening techniques. Pre-drilling holes in the rungs helps prevent splitting when using screws or bolts. We can also add a touch of wood glue for extra stability.
For alignment strategies, we should dry-fit all shelves before securing anything. This allows us to check that everything lines up perfectly. Don’t forget to use spacers to guarantee consistent height. Finally, leveling each shelf ensures our masterpiece isn’t tilted. With a bit of care, our ladder shelves will be both functional and stylish! Additionally, using adjustable features can enhance the versatility of your ladder shelves, allowing for customized height placements.
Designing and Configuring Your Ladder Shelves
Designing and configuring your ladder shelves can be a fun project that adds character to any room. First, let’s measure the available space to determine the ideal shelf height and width. Remember, we want our shelves to fit without overcrowding the room.
Next, think about shelf depth; it’s wise to choose deeper shelves at the bottom for stability and to balance the shallower ones on top. We can create an inviting look by blending a few decorative items with functional storage. Additionally, incorporating airtight storage containers can help keep pantry items fresh and organized.
How about considering compact corner ladder shelves if space is tight? They’re perfect for awkward spots! And don’t forget to leave enough gap between shelves—this allows us to display taller objects while keeping everything tidy.
Finishing Touches for Aesthetic and Protection
After we’ve carefully designed and configured our ladder shelves to suit our space, it’s time to think about the finishing touches. Choosing the right finishing options can elevate the aesthetics while protecting our hard work. We can go for a clear lacquer for a hard finish or a natural oil for a more subdued look.
To guarantee our shelves stand the test of time, applying protective coatings is essential. A polyurethane topcoat shields our vibrant paint or stain from daily wear and tear. Additionally, just like a 360-degree rotation enhances the cleaning efficiency of a spin mop, selecting the right finish can significantly improve the durability of your shelves. And don’t forget to let everything cure—waiting 72 hours before use is a must! So, what finish are you leaning towards? It’s a fun choice that adds personality to our ladder shelves!
Ensuring Safety and Stability When Using Ladder Shelves
When we repurpose ladders as shelves, ensuring safety and stability is our top priority — and honestly, it should be for any shelving project. First, we must perform stability checks. Inspect for cracks, loose screws, or weak joints before use. Remember, safety regulations are there for a reason!
Next, it’s essential to anchor our ladder shelves. Use heavy-duty brackets to secure our shelves to wall studs or the floor, reducing the risk of tipping.
We should also avoid overload. Check the ladder’s load rating and distribute weight evenly. Place heavier items on lower shelves to maintain balance—no one wants a top-shelf avalanche!
Regular maintenance is key, too. Let’s keep our ladders safe and functional! Additionally, considering the weight capacity of the items stored can help prevent potential hazards and ensure a longer lifespan for your ladder shelves.
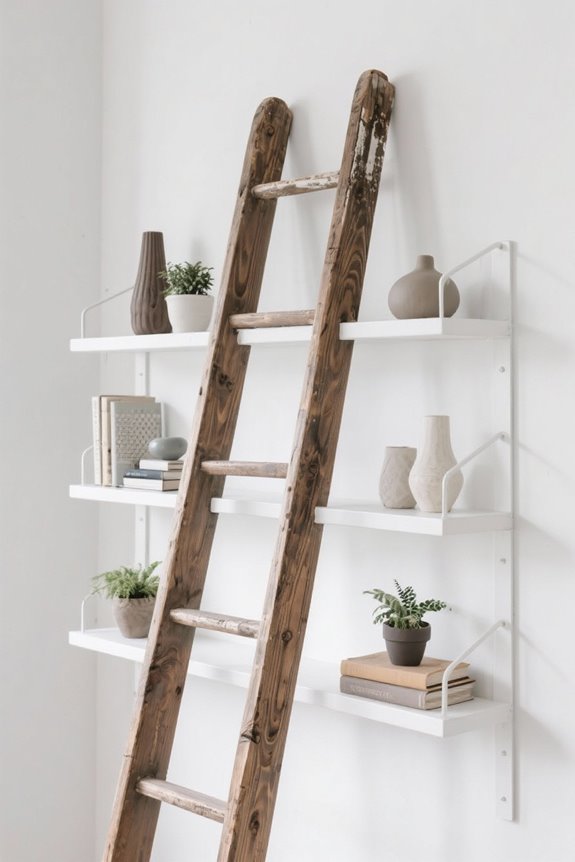
Creative Uses and Styling Ideas for Ladder Shelves
Have you ever wondered how a simple ladder can transform into a stylish shelving unit? We can get creative with ladder decor by implementing various shelf arrangements. For a balanced look, let’s use symmetry by placing similar items on opposite sides. We can layer our decor, putting larger pieces at the back and smaller items in front, creating a visually interesting display. Don’t forget to stack books both horizontally and vertically, using them as platforms for vases. Incorporating colorful accents contrasting our room palette can also make a big difference! Plus, we can change our decor seasonally, keeping our ladder shelves fresh and exciting throughout the year. Isn’t that a fun way to showcase our personal style? Additionally, using durable materials for your ladder shelves can enhance their functionality and longevity.
Frequently Asked Questions
What Types of Ladders Work Best for Outdoor Use?
For outdoor use, we recommend metal ladders for durability, folding ladders for portability, and wooden ladders for aesthetics. Decorative ladders can add charm, but we should guarantee they’re properly maintained for longevity.
How Can I Clean and Maintain My Ladder Shelves?
Just like maintaining a strong ladder guarantees our safety, keeping our ladder shelves clean boosts shelf organization. We should regularly wipe them down, check for wear, and avoid overload to preserve their longevity and stability.
Can I Paint Ladder Shelves With Chalk Paint?
Yes, we can definitely paint ladder shelves with chalk paint. Its benefits include excellent adhesion and customizable colors. With proper ladder paint preparation, we can achieve a stunning, vintage look while ensuring durability and longevity.
What Tools Do I Need for Ladder Shelving Projects?
We’ll need various tools for our ladder shelving projects, like a drill or miter saw. Depending on ladder types, the right gear can make us feel like masters of DIY instead of mere amateurs.
How Do I Secure Ladder Shelves to the Floor?
To secure ladder shelves to the floor, we’ll use securing brackets attached to joists, ensuring ladder stability. A stud finder helps locate solid anchor points, guaranteeing our shelves remain safe and steady.


