As an Amazon Associate, we earn from qualifying purchases. Some links on this site are affiliate links at no extra cost to you. Our recommendations are based on thorough research and editorial judgment.


How To Clean Spin Mop Buckets After Use?

After using our spin mop, let’s clean the bucket to keep it fresh for next time. First, we should rinse the dirty water compartment well, and then give the interior a deep clean with a bleach-water mix. Don’t forget to scrub the corners! Next, we can flush the clean water compartment until it runs clear. Finally, let’s inspect and wash the mop head properly. Want tips for maintaining everything? Stick around for more insights!
Key Takeaways
- Rinse the bucket thoroughly to eliminate any leftover cleaning solutions and prevent odors.
- Wipe down the bucket with a towel to aid in quick drying.
- Keep the blue cap and red lever open for proper air drying.
- Check for any remaining residue in the bucket to maintain cleanliness.
- Regularly clean the bucket after each use to ensure effective and hygienic cleaning.
Understanding the Importance of Cleaning Your Spin Mop Bucket
You may be interested
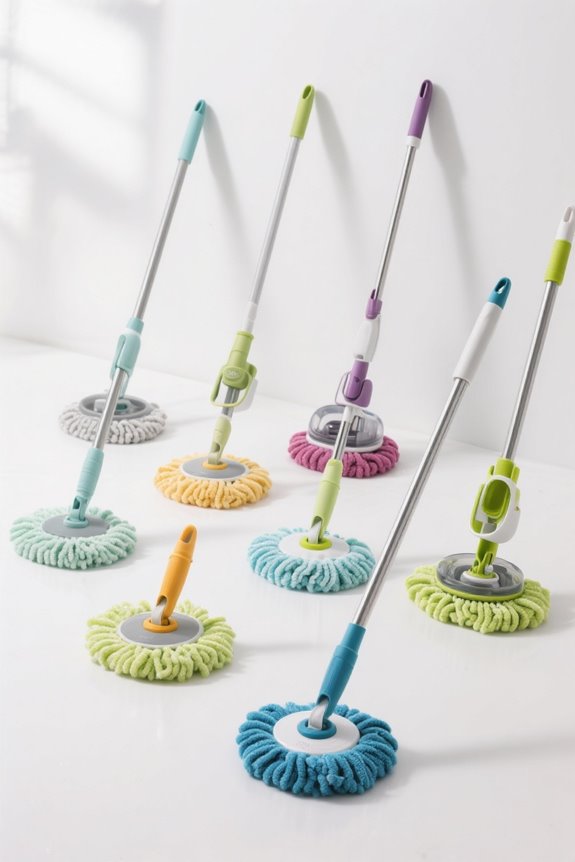
10 Best Microfiber Spin Mops That Will Make Cleaning a Breeze
October 10, 2025

10 Best Spin Mop Buckets for Effortless Cleaning in 2026
October 10, 2025
When we think about cleaning, we often focus on the floors, but what about the tools we use? Spin mop hygiene starts with our trusty buckets. A clean bucket isn’t just nice to look at; it’s vital for keeping our homes healthy. Using a two-tank system helps separate clean and dirty water, preventing cross-contamination. This means fewer germs like E. coli and Staph. aureus make their way onto our floors. Additionally, using heavy-duty materials in your cleaning tools can enhance their effectiveness and longevity. Let’s not forget that bucket maintenance is important, too. Dirty mop water can become a breeding ground for bacteria. Regularly cleaning our buckets reduces health risks and can even make our cleaning more effective. So, who wants to mop with dirty water? Not us!
Immediate Steps After Using the Spin Mop

After we finish cleaning with our spin mop, the final thing we want is to leave our bucket feeling neglected. So, let’s jump into those immediate actions for a sparkling clean bucket!
First, we should rinse it thoroughly to tackle any leftover cleaning solutions. Next, we wipe it down with a towel. This helps with quick drying and cuts down on moisture, which we definitely want to avoid.
Remember to keep the blue cap and red lever open! This helps with air drying, preventing any nasty mold from creeping in. Ultimately, let’s check for any residue—nobody wants a smelly surprise later! By following these steps, our spin mop bucket stays fresh and clean, ready for the next use!
Preparing for the Cleaning Process

To kick off our cleaning journey, we want to make certain our workspace is ready for action. First, let’s create a pre-cleaning checklist. This helps guarantee we don’t forget any steps!
- Clear the Area: Choose a well-ventilated space to prevent mold growth.
- Set Up: Find a stable, flat surface for the bucket to avoid spills.
- Gather Supplies: Collect your cleaning tools—like sponges, mild detergent, and possibly a soft brush—before diving in.
- Wear Gloves: Keep our hands safe from cleaning solutions and grime.
Additionally, considering the importance of organization can make your cleaning process more efficient.
With everything organized and accessible, we’re ready to tackle that dirty mop bucket. Who knew cleaning could be this easy? Let’s get to it!
Recommended Products

𝗨𝗹𝘁𝗶𝗺𝗮𝘁𝗲 𝗖𝗹𝗲𝗮𝗻𝗶𝗻𝗴 𝗖𝗼𝗺𝗯𝗼: The Bettaclean foldable mop and broom set offers unmatched home cleaning convenience; a heavy duty mop paired with a collapsible mop and bucket with wringer set for home use, suitable for all surfaces, including as a mop for concrete floors

HANDS-FREE WRINGING: Our exclusive mop bucket design features a built-in wringer that allows for hands-free wringing while Splash Guard keeps water splash and spray inside the bucket when wringing or when transporting the bucket from room to room

Cleaning Supplies Collapsible Mop Bucket:The bucket for cleaning is collapsible and can be folded for storage by pressing down with both hands. The mop bucket has holes around the edges for hanging on the wall, storing in a wardrobe or drawer, and can be used as a car wash bucket. Effortlessly handle chores like watering the garden, tidying clutter or toys, and gathering laundry with the 16L (4.2 gallon) bucket (no lid included). This collapsible bucket is more than you deserve in addition to having these cleaning tools such as shower organizer cleaning caddy, wash basin, mop and bucket with wringer set for home, spin mop and bucket, bathroom organizers and storage at home!
Rinsing the Dirty Water Compartment

Now that we’ve prepared our space, it’s time to tackle the dirty water compartment of our spin mop bucket. Proper dirty water management starts by immediately discarding any leftover water to keep odors and bacteria at bay. We can use warm water for rinsing techniques that help remove debris. Pouring water directly into the compartment can flush out those hard-to-reach areas where dirt likes to hide. Remember, the sooner we rinse the compartment, the less sticky residue we’ll deal with later! After rinsing, it’s best to leave the compartment open to dry. This simple step helps promote airflow and prevents mold from taking root. Additionally, using high-quality materials in your cleaning tools can enhance their durability and effectiveness. When it comes to cleaning, a little effort goes a long way!
Deep Cleaning the Bucket Interiors
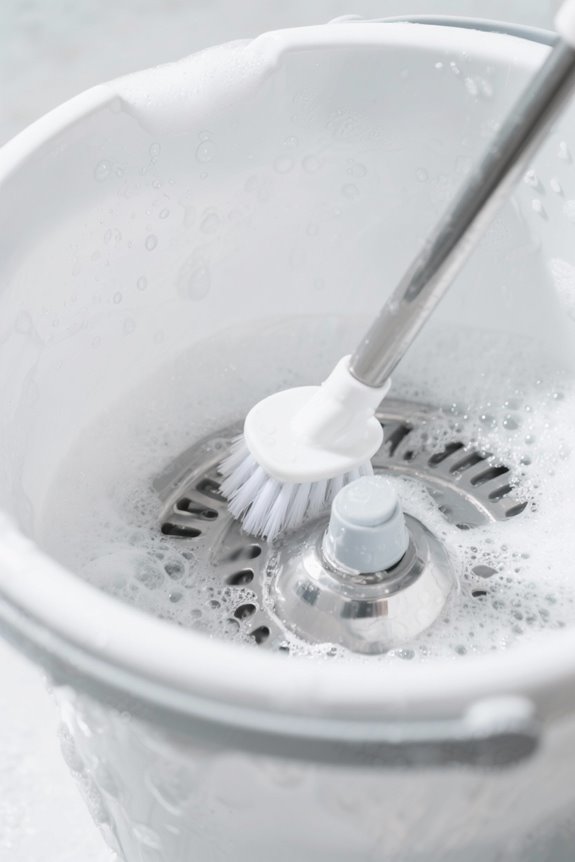
When we consider maintaining the cleanliness of our spin mop bucket, deep cleaning the interiors is essential for a fresh and hygienic experience. To kick things off, let’s mix ½ cup of bleach or a suitable disinfectant with one gallon of hot water. We should then soak the bucket’s interior surfaces for 10 to 15 minutes. This soaking helps guarantee disinfectant effectiveness in killing any lingering bacteria.
Next, we can scrub those hard-to-reach corners and seams with a brush, removing trapped grime. Remember, cleaning frequency matters! Deep clean your bucket after several uses or whenever odors arise, preventing any mold or bacterial buildup. Additionally, using chemical-free cleaning options can further enhance the safety of your cleaning routine. Finally, always dry the bucket completely afterward to keep those pesky microbes at bay. Let’s keep our buckets sparkling!
Flushing the Clean Water Compartment
Flushing the clean water compartment is one of the most essential steps in keeping our spin mop bucket fresh and effective. To begin the flush procedure, we should immediately empty any remaining clean water after mopping. Next, we rinse the blue tank under running water to guarantee effective residue removal. If we notice any mineral deposits, it’s helpful to scrub the compartment lightly with a cloth or sponge. We’ll want to repeat rinsing until the water runs clear and no suds remain. Leaving the blue cap and red valve open promotes air drying, preventing moisture buildup. Following these steps consistently not only keeps our mop bucket ready for action; it also extends its lifespan. Regular maintenance, including reusable mop heads, ensures that your cleaning sessions remain efficient and effective. Happy mopping!
Choosing the Right Cleaning Products
Choosing the right cleaning products can make all the difference in how well our spin mop bucket performs and lasts. We need to prioritize safety and effectiveness while ensuring compatibility with our materials. For those of us who enjoy eco-friendly options, natural alternatives like white vinegar or baking soda can be fantastic.
Consider these tips:
- Always do compatibility checks by testing a small amount of cleaning product.
- Avoid harsh chemicals like bleach that may damage our buckets.
- Look for pH-neutral or antibacterial solutions designed for mop buckets. Additionally, using eco-friendly cleaning solutions can enhance the performance and longevity of your cleaning system.
Recommended Products

Maintains polish without stripping protective coating

Neutral pH Floor Cleaner: Cleans and restores shine while preserving polish and not stripping away protective coatings on your floors. No rinsing required

PH NEUTRAL FLOOR CLEANER FOR DAILY USE – Safe for routine cleaning on tile, stone, marble, and sealed floors without damage, dulling, or residue buildup.
Rinsing Off Soap and Residue
After we’ve chosen the right cleaning products for our spin mop bucket, it’s time to focus on rinsing off soap and residue effectively. First, let’s rinse our bucket immediately after use to prevent soap residue buildup. We should use clean, warm water to flush out the soap and dirt left behind.
Don’t forget to agitate the rinse water by swirling it around—this aids in rinse efficiency. If we notice stubborn spots like corners or edges, scrubbing with a sponge can help dislodge any hidden residue. Multiple rinses may be needed if we’ve used concentrated cleaning agents. Additionally, keeping the bucket clean and ready ensures optimal performance during our next mopping session. By following these steps, we’re ensuring maximum residue prevention, keeping our bucket clean and ready for the next round of mopping!
Drying the Bucket Properly
When it comes to drying our spin mop bucket properly, we can’t just leave it to chance. Using effective drying techniques can boost our bucket maintenance. First, we should leave all compartments and lids open, allowing air to circulate. Next, let’s remove detachable parts like inner tanks to maximize airflow.
Positioning the bucket upside down helps drain excess water and promotes quicker drying. We should also place our bucket in a well-ventilated area. If we’ve got a fan, we can use that too to speed things up! Additionally, ensuring that the bucket is free from excess moisture will help prevent any unwanted mold growth.
Storing the Bucket to Prevent Mildew
To keep our spin mop bucket free from mildew, we need to pay attention to how we store it. Proper mildew prevention starts with choosing the right spot. Let’s store it in a dry, ventilated area, away from any moisture. Using shelving can keep it off damp floors, and keeping windows open will help airflow.
We might want to use moisture absorbers like silica gel packets or even baking soda to combat humidity. Remember, it’s best to leave the lid off or ajar for air circulation. By following these storage techniques, we can guarantee our bucket stays in great shape and ready for our next cleaning adventure! Additionally, ensuring that the bucket is made of durable, BPA-free materials can further prevent the growth of mildew and enhance its longevity.
Maintaining a Clean Mop Head
Keeping our spin mop bucket mildew-free sets the stage for the next step in maintaining our cleaning tools—keeping the mop head clean. Proper mop head care is essential for lasting freshness, and we can start by neutralizing odors. Soaking the mop head in hot water mixed with a cup of white vinegar for a few minutes works wonders.
After soaking, we must rinse it thoroughly to remove any vinegar residue. If the mop head is machine washable, we can wash it on a gentle cycle with mild detergent, avoiding bleach. For manual washing, warm water and detergent do the trick. Let’s make sure to air-dry the mop head completely before its next use, preventing nasty bacterial odors and extending its lifespan. Additionally, ensuring efficient organization of cleaning supplies can help maintain their longevity and accessibility.
Recommended Products

❥【Perfect Fit for Triangle Spin Mop】 - Package includes 4 Pack spin mop refills only. Mop handle, red triangle base, and bucket are not included. Compatible with the Easy Wring Spin Mop & Bucket system, work well as original refills. The mop replace head, not only saves you time and money, but also provides you with the convenience of cleaning

✔【Value Pack Mop head replacement】: You will get 4 pack mop heads replacements compatible with ocedar for your spin mop, which will last for one year use. The mop replace head for o cedar, not only saves you time and money, but also provides you with the convenience of cleaning.

NEW UPGRADE: Our mop refill has a new 40% cleaning area, aest for smooth surface floors such as wooden floors,tile,laminate,marble and other sealed hard floors,the mop refill is soft and won't scratch the surface you're cleaning,and it's also great for car washing,window cleaning,and more.
Inspecting and Replacing Mop Heads
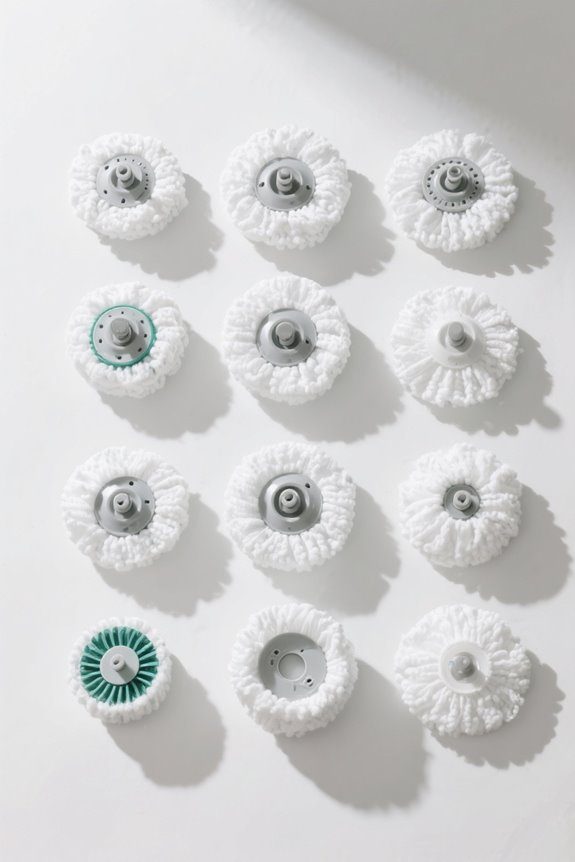
A thorough inspection of our mop heads can make all the difference in maintaining their effectiveness. After every use, let’s detach the mop head and take a good look at it. During our mop head inspection, we should check for signs like fraying fibers, lingering odors, or discoloration. If the mop head still smells bad after washing, it’s probably time for a replacement.
We recommend sticking to a replacement schedule of every 3–6 months, especially if we notice any wear. Keeping a few spare mop heads handy can help prevent downtime. Remember to securely attach any new heads and check for proper fit before using them. A well-maintained mop head keeps our cleaning game strong!
Recommended Products

MICROFIBER REPLACEMENT HEADS: These spin mop refills are made with microfiber material for effective dirt and grime removal.

Highly durable: You will receive 4 pack reusable replacement mop heads for your rotary mop.

✅【Perfect Fit for Spin Mop & 1-Tank System】These mop replacement heads are precision designed for triangle swivel spin mops and compatible with Easy Wring 1-tank system. As reliable oceda spin mop replacement head alternatives, they snap securely into place. Inner triangle diameter 3.9 inches, outer 5.7 inches. ONLY fits 1-chamber bucket, NOT compatible with dual-chamber rinse clean systems; serves as your daily o ceda mop head replacement for consistent cleaning performance.
Regular Maintenance of Spin Mop Systems
Maintaining our spin mop systems isn’t just about keeping things clean; it’s also about keeping them efficient. For effective spin mop maintenance, we should start by rinsing the bucket after each use. This helps prevent the buildup of dirt and cleaning solution residue. Remember, using only the recommended amount of cleaner can make rinsing easier.
Next, we should make sure proper bucket hygiene by air drying our buckets with the cap open, which helps avoid mold. Additionally, let’s regularly wash the mop heads and check that the wringing mechanism is working well. Finally, don’t forget to disinfect the system periodically. This little effort goes a long way in maintaining the effectiveness of our cleaning tools, making every mopping session a breeze!
Recommended Products

【Perfect Fit】: The spin mop bucket gear replacement Compatiable with O-Ceda, Velida and 90% suitable for other brands of mop and bucket with wringer set in the market. For example, O-Ceda Easywrin 1-tank and RinsClean 2-tank spin mop and bucket system. Please Double Check the spin mop bucket replace gear size before to purchase.

[Applicable Model]: The mop replace heads, mop base and mop handle set is ONLY compatible with O-Ceda EasyWring Microfiber Spin Mop. NOTE: The repalcement parts only compatible with Ocedar 1-Tank system, NOT compatible with O cedar 2-Tanks RinseClean system

【Compatiable with Most Rotated Spin Mop Bucket】- The spin mop bucket gear replacement can be 100% suitable for O-Ceda and Vilida, and 95% suitable for other brands of rotary mops in the market,compatible with O-ceda Easywring 1-tank and RinsClean 2-tank spin mop bucket system. Please Double Check the spin mop bucket replacement gear size and rotation of the gear before to purchase.
Tips for Storing Your Mop and Bucket Safely
When we store our mop and bucket safely, we not only prolong their life but also guarantee they’re ready for action whenever we need them. Let’s follow a few safety guidelines to make sure they stay in top condition.
Wall-Mounted Holders
– Use wall-mounted holders to save space and store mops vertically, avoiding bends.
Cleaning and Drying
– Rinse and wring mop heads well before storage, and let them air dry completely to prevent mold.
Organized Storage
– Use labeled shelving for easy access to supplies, keeping frequently used items close by.
Safety First
– Store away from sunlight and keep cleaning chemicals separate. Never overcrowd your storage to reduce accidents.
If we follow these storage solutions, our mop and bucket will always be ready for a cleaning showdown!
Frequently Asked Questions
Can I Use Bleach to Clean My Spin Mop Bucket?
We can use bleach solutions to clean our spin mop bucket, but we should make certain it’s diluted properly and compatible with the material. However, safe alternatives, like soap and water, are often more effective and less risky.
How Often Should I Replace My Spin Mop Head?
We should replace our spin mop head every three months to maintain its effectiveness. This replacement schedule aligns with our cleaning frequency, ensuring our mop remains efficient and hygienic for tackling dirt on our floors.
What’s the Best Way to Prevent Odors in the Bucket?
To prevent odors, we should prioritize thorough mop maintenance and regular cleaning. It’s essential to rinse the bucket well and guarantee it’s completely dry, which helps eliminate moisture that can lead to unpleasant smells.
Can I Use a Dishwasher to Clean Mop Accessories?
We shouldn’t use dishwashers for mop accessory cleaning due to potential damage. While it seems convenient, dishwasher safety concerns, like warping or weakening, remind us that hand washing is ultimately safer and more effective for longevity.
How Do I Know When to Deep Clean My Bucket?
Did you know that 20% of households overlook deep cleaning their mop buckets? We should look for signs needing a deep clean, like visible dirt, odors, or stubborn stains, to maintain hygiene effectively.


